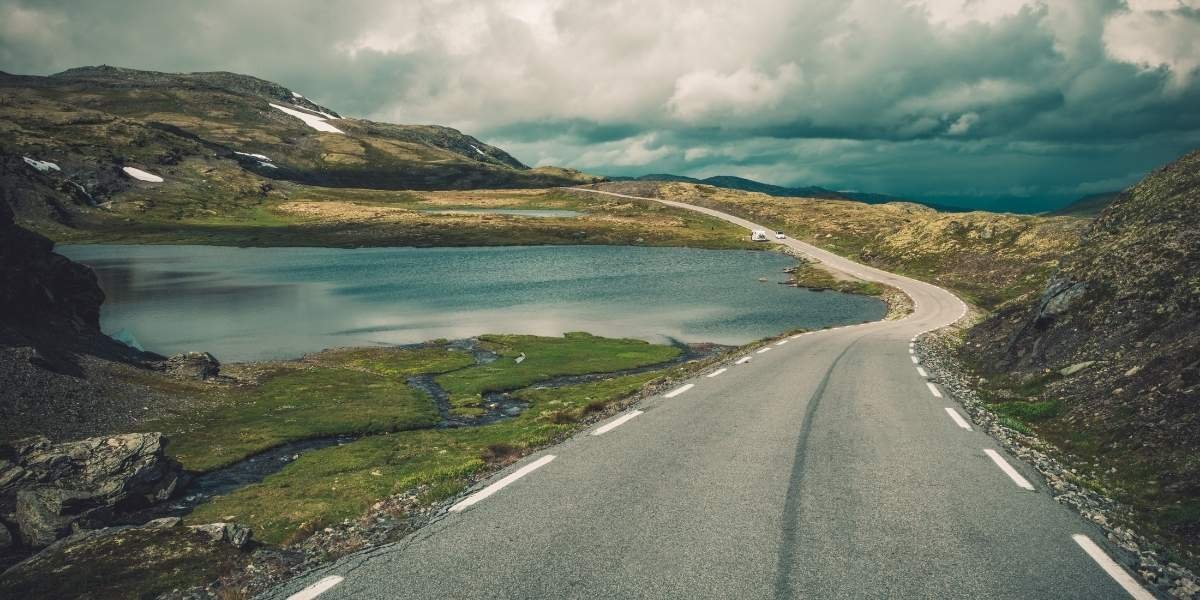
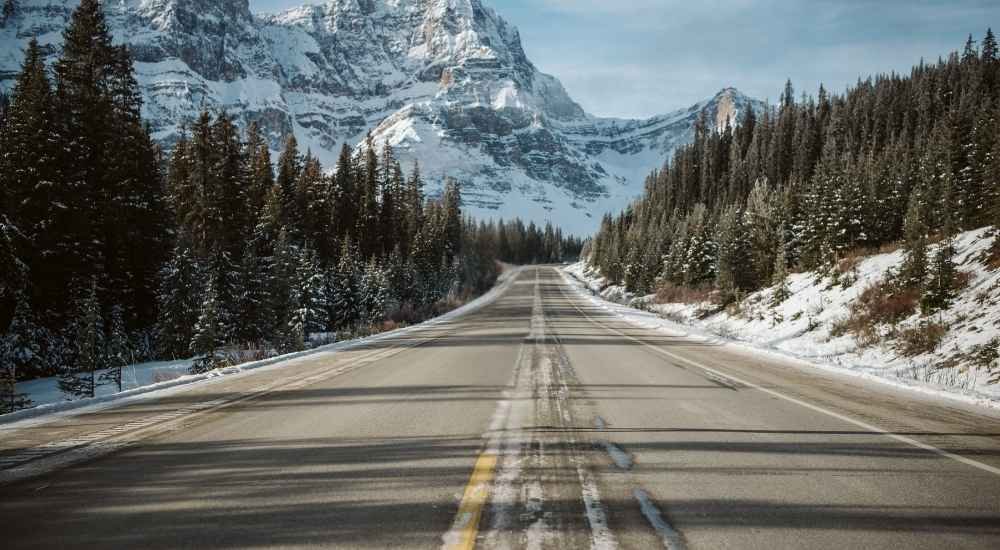
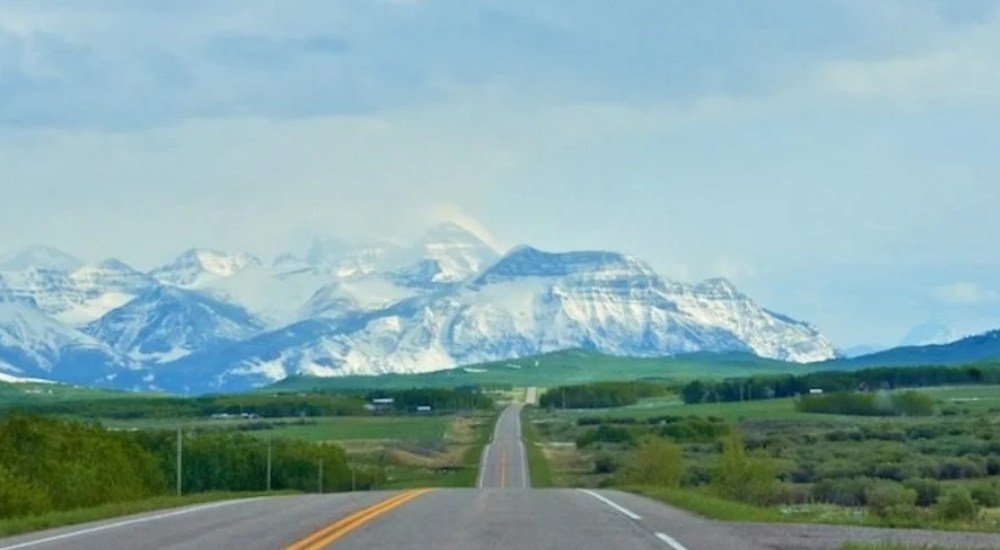
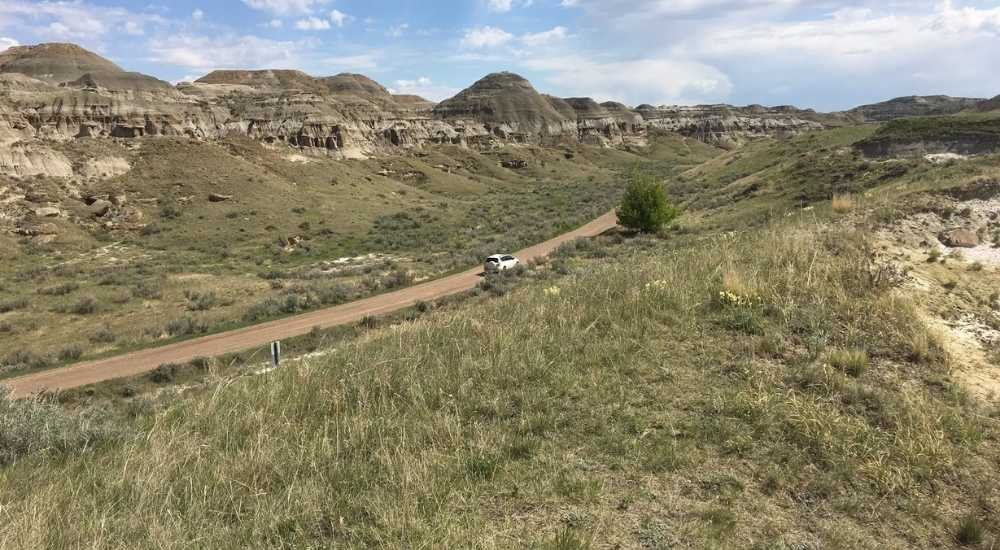
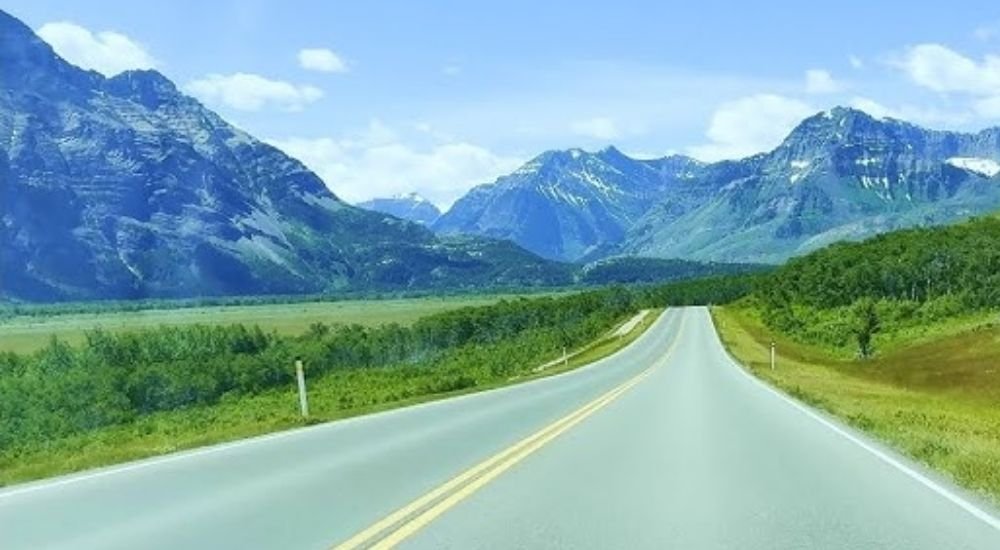
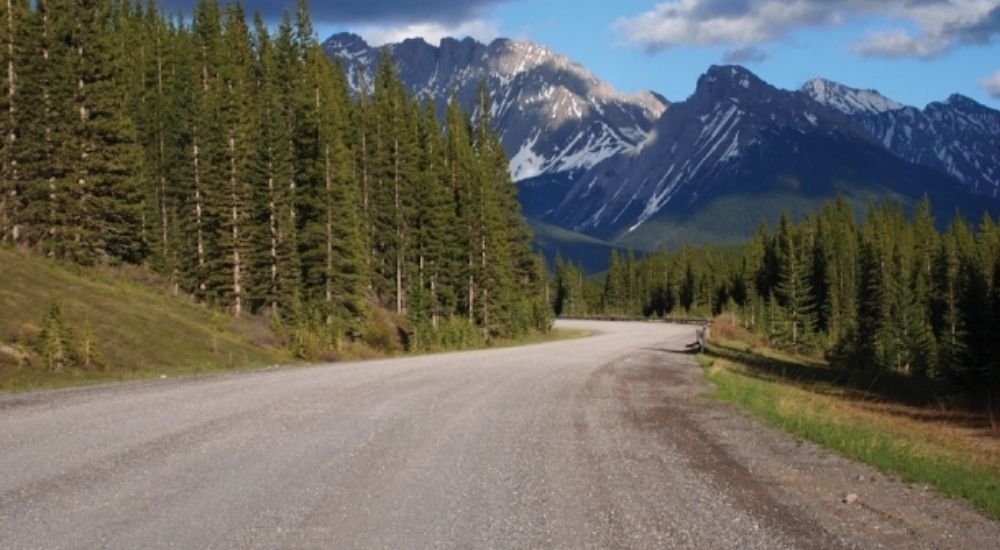
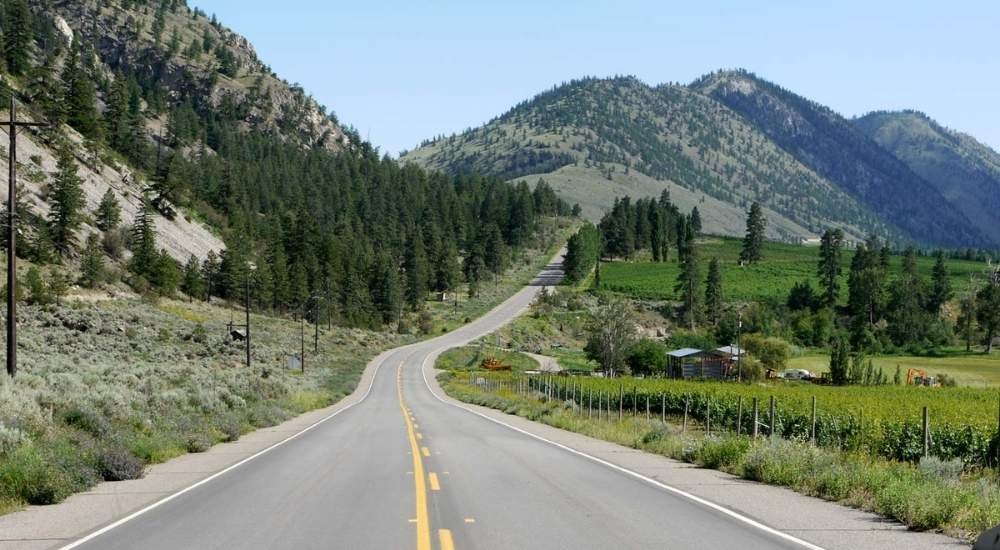
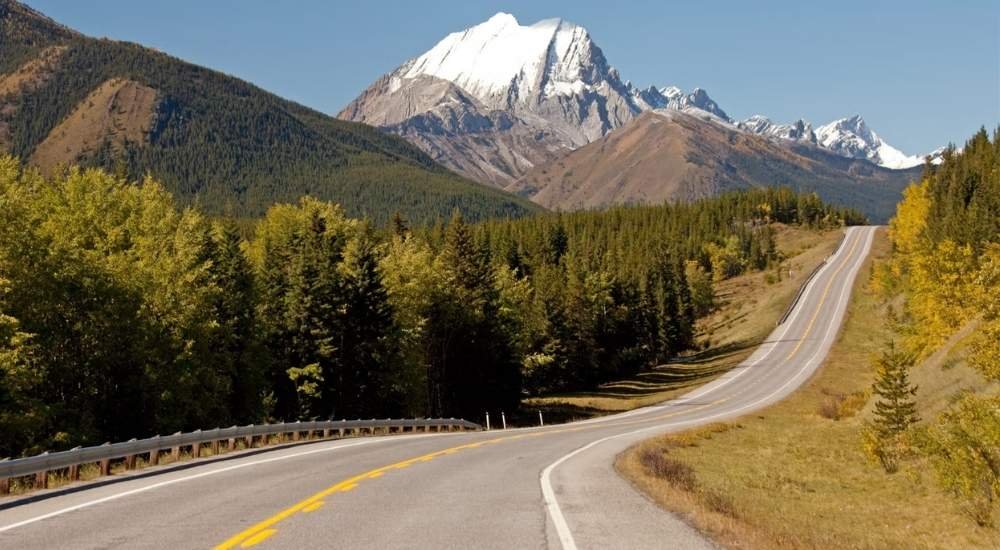
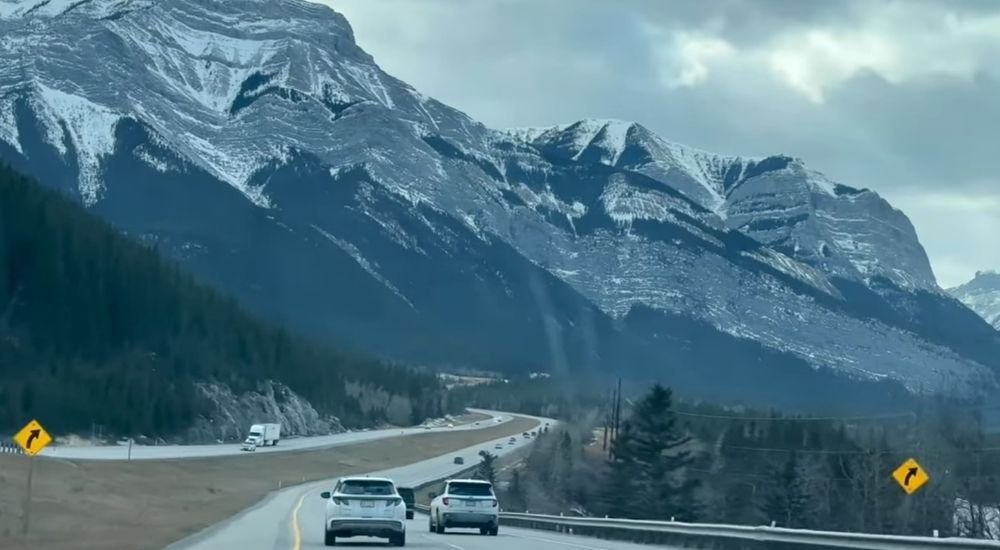
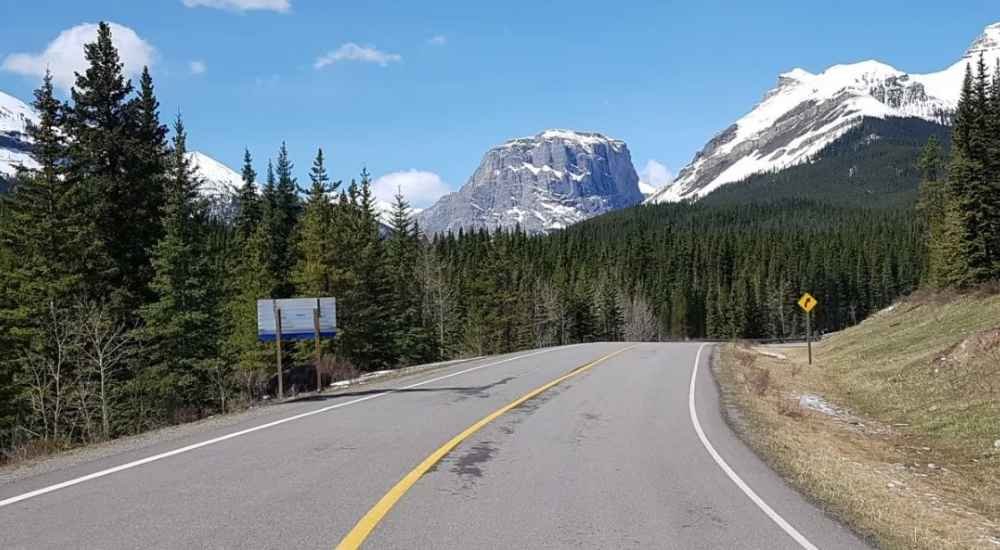
Alberta is one of the best places in Canada for a road trip, and I learned that first-hand after moving to Edmonton. Every time I drive across the province, I’m blown away by the mix of mountains, prairies, badlands, lakes, and small towns.
These drives inspired me to start this website, so I could share real road trip tips from someone who actually lives here. If you love open highways, big views, and discovering new places, you’ll feel right at home on Alberta’s roads.
What makes road trips in Alberta so special is how much you can see in one journey. You can start your morning in the Rocky Mountains, pass by turquoise lakes and glacier valleys, then end your day in rolling ranch country or wide-open prairie.
Popular drives like the Icefields Parkway, Cowboy Trail, and Smith-Dorrien Trail give you world-class scenery at every turn.
In this guide, I’ll share the 10 best road trips in Alberta, based on real experiences, easy routes, and scenery that keeps many tourists flocking to Alberta every year. The road trips that promise breathtaking views, fascinating history, and plenty of adventure along the way.
1. Icefields Parkway (Highway 93)
If you’re craving a road trip that feels like driving through a movie, the Icefields Parkway is the one you’ll never forget. This world-famous route runs for about 230 km (143 miles) from Lake Louise to Jasper, taking you right through the centre of the Canadian Rockies.
It’s often called one of the best scenic drives in Alberta, and honestly, it deserves the title. Every time I drive it, I feel like I’m seeing the mountains again for the first time.
You can drive the whole thing in around three hours, but trust me, you won’t want to. Plan for a full day so you can stop at viewpoints, try easy hikes, and enjoy the natural beauty around you. Summer is the ideal time for this drive because the roads are clear, the trails are open, and you’ll have more chances to explore.
Winter is stunning too, with snowy mountains and frozen waterfalls, but always check road reports and pack winter gear. The parkway is remote, so fill up on gas in Lake Louise or Jasper before you start, and bring snacks, water, and a jacket.
One thing I always tell people: the Icefields Parkway is not just a highway — it’s a full-day adventure with incredible stops. Here are the top places you should not miss along the way:
Best Stops Along the Icefields Parkway
Peyto Lake – Famous for its wolf-head shape and bright turquoise colour. A must for photos.
Bow Lake – A calm and peaceful lake surrounded by mountains. Great for short walks.
Mistaya Canyon – A quick walk to a twisting canyon carved by rushing water.
Athabasca Glacier (Columbia Icefield) – Join a guided glacier tour or visit the Icefield Discovery Centre.
Glacier Skywalk – A glass walkway hanging over a deep canyon with amazing views.
Sunwapta Falls – Easy access to dramatic waterfalls and walking paths.
Athabasca Falls – One of Jasper’s most powerful waterfalls with safe viewing areas.
Things to Do
Try short hikes like Parker Ridge, Wilcox Pass, or Bow Summit Lookout.
Keep an eye out for wildlife such as mountain goats, elk, big-horn sheep, or even bears.
Bring a full battery for your camera or phone — you’ll take more pictures than you expect.
Start early to avoid traffic and enjoy the quiet mountain air.
2. Cowboy Trail (Highway 22)
For a real taste of Alberta’s western heritage, the Cowboy Trail is a must for any Alberta road trip itinerary. This historic route runs for about 700 km along Highway 22, following the same path early cattle drivers once used across the foothills. The drive takes you through rolling hills, ranchland, small towns, and nonstop mountain views.
You can explore the whole trail or enjoy it in smaller sections, but every part offers something special. Starting near Mayerthorpe (not far from Edmonton), the route leads you south through towns with real Western charm.
This is a trip where you take your time, meet friendly locals, eat in small diners, and enjoy open landscapes that stretch for miles. Summer and fall are the best times to visit because the foothills glow with colour and the local attractions are open. Bring water, snacks, and a camera—you’ll stop more than you think.
The Cowboy Trail is packed with history, small adventures, wildlife, and classic Alberta scenery. Here are some of the must-see places and things to do along the way:
Key Towns & Best Stops
Mayerthorpe – Start of the route if you’re coming from Edmonton.
Sundre – Visit the Sundre District Museum or explore nearby outdoor trails.
Rocky Mountain House – A great stop for history, local shops, and river views.
Cochrane & Bragg Creek – Popular foothill towns with cafés, parks, and art shops.
Turner Valley (Diamond Valley) – Known for Western culture and small-town charm.
Bar U Ranch National Historic Site – A must-visit heritage ranch that shows Alberta’s true ranching past.
Lundbreck Falls – A beautiful double waterfall right off the highway.
Pincher Creek & Cardston – Scenic southern towns with deep local history.
Historic Highlights
Walk through Bar U Ranch, one of Canada’s most important ranching landmarks.
Visit small museums in towns like Sundre, Cochrane, and Cardston to learn about early settlers.
Try local restaurants and cafés that still reflect Alberta’s Western style.
Outdoor Activities
Rent ATVs or explore hiking trails near Sundre.
Enjoy horseback riding around Panther Valley—perfect for western-style adventures.
Stop at lakes, viewpoints, and trailheads all along the foothills.
Wildlife Encounters
Near Ya Ha Tinda Ranch, keep an eye out for wild horses—about 1,200 live in the area.
You can also visit the Wild Horses of Alberta Society to learn about conservation and meet rescued horses.
Watch for deer, hawks, and coyotes along the fence lines.
3. Canadian Badlands Dinosaur Trail (Drumheller Loop)
Drive time: 1–2 hours (more if you explore the attractions) Why it’s amazing: Otherworldly canyon views, dinosaur history, hoodoos
If you want a road trip that feels completely different from Alberta’s mountain drives, the Canadian Badlands Dinosaur Trail is the perfect choice. This route takes you into a world shaped by millions of years of erosion, where deep canyons, strange rock formations, and open desert landscapes make you feel like you’ve stepped into another planet.
Starting in Drumheller, the city nicknamed the Dinosaur Capital of the World, this loop is short but packed with some of Alberta’s most iconic natural and historic sites.
Begin your journey at the Royal Tyrrell Museum, one of Alberta’s top attractions and home to one of the largest collections of dinosaur fossils ever found. Walking through the museum’s exhibits is like travelling back in time, with massive skeletons discovered right in the Badlands.
From there, follow the Dinosaur Trail toward Horsethief Canyon and Horseshoe Canyon, two of the most dramatic viewpoints in the region. Their hidden hiking trails reveal layered rock walls, rugged ridges, and sweeping views that highlight the Badlands’ ancient geological story.
To dive deeper into the landscape, continue south to the Hoodoo Trail, where you’ll find Alberta’s famous hoodoos—tall, thin rock towers shaped by millions of years of wind and water. These formations are some of the most photographed landmarks in the province.
If you have time, extend your road trip to Dinosaur Provincial Park, a UNESCO World Heritage Site known worldwide for its fossil beds, interpretive trails, and guided tours that reveal hidden parts of the Badlands.
More Stops to Explore
The Dinosaur Trail and surrounding region offer plenty of ways to experience Alberta’s history and culture:
Badlands Amphitheatre – Outdoor shows surrounded by canyon walls
Atlas Coal Mine Historic Site – One of Canada’s best-preserved mining sites
Star Mine Suspension Bridge – Cross the Red Deer River with stunning views
4. Waterton Lakes National Park
Waterton Lakes National Park is just a short one-hour drive south of Castle Provincial Park. This route is a scenic way to experience the dramatic transition from Alberta’s rolling prairies to the rugged peaks of the Rocky Mountains.
Start your journey at Castle Provincial Park, Alberta’s newest park, which is quickly gaining popularity for its excellent hiking and camping opportunities. In the winter, locals flock to Castle Mountain Ski Resort for some of Alberta’s best snow and a laid-back vibe. Whether you’re into hiking, camping, or winter sports, this area is a hidden gem that’s high on many adventurers’ lists.
As you continue south, you’ll arrive at Waterton Lakes National Park, a place where prairie grasslands meet towering mountains right on the border with the United States. This rare combination of ecosystems means you’ll find a diverse mix of flora and fauna, making it a paradise for nature lovers and photographers alike.
While Waterton is bustling in the summer with visitors enjoying lakeside strolls and boat tours, don’t overlook its winter charm. The town itself is peaceful and quiet during the colder months, but the surrounding natural environment remains vibrant. One of the best winter activities in Alberta parks is hiking to Bear’s Hump. This short but rewarding trail offers sweeping views over the lakes and mountains—perfect for a crisp winter day.
Things to do:
Driving time: Castle Provincial Park to Waterton Lakes – about 1 hour
Must-do hike: Bear’s Hump for panoramic vistas
Winter fun: Castle Mountain Ski Resort for skiing and snowboarding
Wildlife spotting: Watch for deer, bears, and unique prairie species
The Smith-Dorrien Trail delivers 70 kilometres of pure mountain adventure that starts right in Canmore, just 20 minutes from the Trans-Canada Highway turnoff. This gravel road (Highway 742) isn't your smooth cruise; it's a rugged route where you'll want to budget at least 1.5 to 2 hours of driving time.
You'll roll past the iconic Three Sisters peaks, trace the bright-blue shoreline of Spray Lake Reservoir for nearly 15 kilometres, then plunge deep into Kananaskis Country's wild heart.
You're guaranteed to spot wildlife here, with elk and mountain goats often blocking the road and grizzly bears looking for food in the meadows from May through September.
The gravel surface demands that you drive slowly, at around 40-50 km/h, which actually works perfectly for spotting critters and stopping at the dozen-plus pullouts for jaw-dropping photos.
You need to fill up your tank in Canmore before you start your journey; there are no gas stations along this route, and you'll burn extra fuel on the rough terrain. As of 2024, no permits or fees are required to drive the Smith-Dorrien, which makes this road one of the most budget-friendly scenic drives in Alberta.
The adventure really kicks in once you start exploring the stops along this Kananaskis Country road trip.
Summer paddlers can rent canoes at Spray Lake for $45 per hour (2024 rates) and fish for trout without a license on the reservoir; it's one of the few places in Alberta where this is allowed.
The Smith-Dorrien eventually hooks into Kananaskis Trail (Highway 40) at the south end, giving you easy access to even more lakes and mountain viewpoints.
Note: Cellphone signal is poor around here, so download offline maps before you go.
6.Crowsnest Pass (Highway 3)
Pincher Creek → BC border Why it’s amazing: Mountain passes, historic sites, waterfalls, and quiet small towns
The Crowsnest Pass runs from Pincher Creek toward the British Columbia border, passing through dramatic mountain passes and historic communities in southern Alberta.
While Highway 3 stretches much farther across Canada, this Alberta portion is especially scenic and full of character. It’s a less crowded alternative to Banff and Jasper, which makes it perfect for travellers looking for a slower, more relaxed Alberta road trip experience.
As you drive through the Crowsnest Pass, you’ll notice the landscape change from open foothills to steep mountain walls. One of the most famous stops is the Frank Slide, where an entire mountainside collapsed in 1903, destroying part of the town of Frank.
Today, you can visit the interpretive centre and walk among massive rock debris. Nearby towns like Crowsnest Pass, Bellevue, and Blairmore offer mining history, local cafés, and small museums that give you a real sense of Alberta’s past. This area feels raw and authentic, with fewer tour buses and more room to explore.
Things to Do in the Crowsnest Pass
Visit the Frank Slide Interpretive Centre to learn about the famous 1903 rockslide and walk among the massive boulders.
Stop at Lundbreck Falls, a beautiful waterfall just a short walk from the parking area.
Explore the towns of Blairmore, Bellevue, and Frank for mining history, local cafés, and small museums.
Hike the Window Mountain Lake Trail for a rewarding walk with mountain views.
Walk Allison Creek Falls Trail, a short and family-friendly hike with a scenic waterfall.
Drive through Crowsnest Pass Provincial Park for quiet roads and rugged mountain scenery.
Look for wildlife, including deer, elk, and bighorn sheep, along the highway and nearby trails.
7.Kananaskis Trail (Highway 40)
Highwood Pass → Kananaskis Country Why it’s amazing: High alpine scenery, wildlife sightings, lakes, and quiet picnic spots
The Kananaskis Trail (Highway 40) is one of the most scenic mountain drives in Alberta, stretching for about 100 km through the heart of Kananaskis Country.
This route includes Highwood Pass, the highest paved mountain pass in Canada at 2,206 metres, and delivers nonstop alpine views, wide valleys, and sharp mountain peaks. Driving the full stretch takes roughly 2 to 3 hours without stops, but most visitors spend half a day enjoying pullouts and short walks.
The road is usually open from mid-June to early December, depending on snow conditions, making summer and early fall the best time for this Alberta road trip.
As you travel along Highway 40, expect frequent wildlife sightings like bighorn sheep, deer, elk, and sometimes bears near meadows and road edges.
The drive passes several beautiful lakes and reservoirs, including Lower and Upper Kananaskis Lakes, which are perfect for picnics, easy lakeside walks, and photography.
A Kananaskis Conservation Pass is required to park in the area and costs about $15 per day or around $90 for an annual pass, making it affordable for day trips or repeat visits. Bring snacks, water, and warm layers, as the weather can change quickly at higher elevations.
8. Calgary to Lake Louise Scenic Drive
Calgary → Lake Louise Why it’s amazing: Fast access to the Rockies, turquoise lakes, and mountain views
The Calgary to Lake Louise drive is one of the most popular and rewarding Alberta road trips, especially for first-time visitors to the Canadian Rockies.
The route covers about 185 km along the Trans-Canada Highway and takes roughly 2 to 2.5 hours without stops. As you leave Calgary, prairie views slowly turn into dramatic mountain scenery near Canmore and Banff.
Once you reach Lake Louise, the scenery becomes truly unforgettable. The bright turquoise lake sits below towering peaks and glaciers, making it one of the most photographed places in Canada.
Parking at Lake Louise costs about $36 per vehicle per day, or you can use the Parks Canada shuttle, which costs around $8 per adult and helps reduce traffic.
A national park day pass is required and costs about $11 per adult or $22 per family. Plan to arrive early, especially in summer, and bring warm layers, water, and snacks. If you want an easy Alberta road trip with world-famous views, the Calgary to Lake Louise drive delivers every time.
Things to Do Along the Way
Calaway Park – A family-friendly amusement park just west of Calgary, perfect for kids and thrill rides before heading into the mountains.
Canmore Town Stop – Walk Main Street, grab coffee, or enjoy views of the Three Sisters mountains.
Banff Avenue – Explore shops, restaurants, and historic buildings in Banff town.
Bow Falls – An easy stop with a short walk and great photo views.
Surprise Corner – A quick viewpoint overlooking the Banff Springs Hotel and Bow River.
Lake Minnewanka – A scenic lake drive with picnic spots and wildlife viewing.
Hiking near Lake Louise – Try easy trails like the Lake Louise Lakeshore Trail or Fairview Lookout.
Photography Stops – Pull over safely to capture mountain peaks, rivers, and forest views.
9. Elk Island & Beaver Hills Scenic Drive
East of Edmonton Why it’s amazing: Free-roaming bison, quiet lakes, forest roads, easy half-day trip
The Elk Island & Beaver Hills Scenic Drive is one of the best short road trips near Edmonton, perfect for those who want to experience nature without a long drive. Located just 35–45 minutes east of downtown Edmonton, this route loops around Elk Island National Park and the rolling Beaver Hills region.
Driving the main roads and scenic loops takes about 1.5 to 2 hours, but most visitors spend 3–4 hours enjoying stops along the way. This area is famous for open meadows, aspen forests, and wide skies.
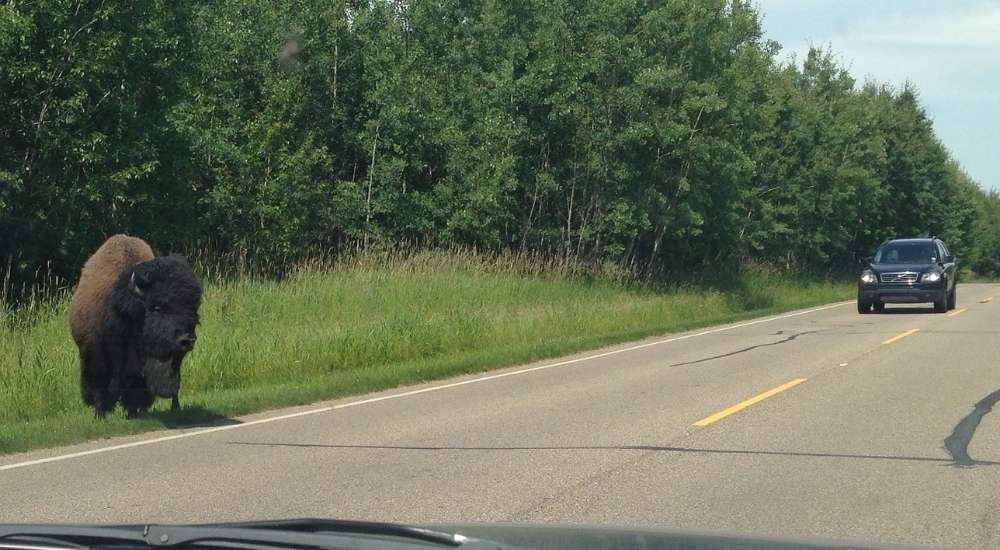
Elk Island National Park is one of the best places in Canada to see wildlife up close. Plains bison and wood bison often stand right beside the road, so drive slowly and keep a safe distance.
A Parks Canada day pass costs about $11 per adult or $22 per family, making it a very affordable getaway. Popular stops include Astotin Lake, Oster Lake, and several picnic areas with tables and washrooms.
The park is also a designated Dark Sky Preserve, making it worthwhile to stay until sunset. Bring binoculars, water, and snacks, and avoid feeding wildlife.
10.Sheep River Road Trip
High River → Turner Valley → Sheep River Provincial Park Why it’s amazing: Small western towns, wildlife sightings, river valleys, hidden gems
The Sheep River Road Trip is one of those Alberta drives that feels personal and full of surprises. Starting in High River, this scenic route heads west through charming foothills towns like Okotoks, Black Diamond, and Turner Valley.
Each stop offers a taste of Alberta’s western heritage, with historic main streets, local shops, cafés, and friendly small-town energy. The relaxed pace and wide-open views make this drive a great addition to any southern Alberta road trip itinerary, especially if you enjoy quieter routes away from busy highways.
One of the most popular stops along the way is the Okotoks Erratic, also known as “Big Rock.” This massive glacial boulder was carried here by ice thousands of years ago and now sits alone in the prairie, which makes it one of Alberta’s most unique natural landmarks.
It’s an easy stop with parking nearby and a short walk to the rock. The place is perfect for photos and a quick break. Many travellers rank this as one of the best day trips from Calgary.
As the road continues west, the scenery becomes more rugged as you enter Sheep River Provincial Park and nearby Bluerock Wildland Provincial Park. These protected areas are known for deep river valleys, forested hills, and quiet mountain backdrops. You’ll find plenty of outdoor activities along the route, including:
Scenic hiking trails for beginners and experienced hikers
Peaceful camping areas near the river and forest
Waterfalls and picnic spots are ideal for a relaxing stop
Wildlife sightings are common on this drive. Moose, deer, birds, and other animals are often seen near the riverbanks and trails. On one short hike, it’s even possible to spot a moose with her calf, so always keep your distance and have your camera ready.
Conclusion on road trips in Alberta
Alberta is one of the best places in Canada for road trips, and each route in this guide shows a different side of the province. From famous drives like the Icefields Parkway and Lake Louise, to quieter routes like the Cowboy Trail, the Sheep River, and the Northern Lights Loop, these journeys offer a mix of mountains, badlands, forests, wildlife, and small-town charm.
The beauty of Alberta road trips is how quickly the scenery changes and how easy it is to build an adventure that fits your time, budget, and travel style.
No matter where you start, the key to a great Alberta road trip is slowing down and enjoying the journey. Plan extra time for stops, pack smart, respect wildlife, and be ready for changing weather.
Some of the best memories come from unexpected viewpoints, local cafés, and quiet backroads. If these drives inspire you to explore more, you’re already on the right path—because in Alberta, the road itself is often the highlight of the trip.
If you're looking for a breathtaking natural wonder in the heart of Alberta, Canada, then Crescent Falls Provincial Recreation Area in Clearwater County is a must-visit destination.
Located in the stunning David Thompson Country, Crescent Falls is a picturesque spot that boasts an awe-inspiring waterfall, scenic hiking trails, and a serene campground. Nestled near the Bighorn Canyon, this area offers a unique blend of natural beauty and outdoor adventure.
Whether you're an avid hiker, a nature enthusiast, or simply someone looking to escape the hustle and bustle of city life, Crescent Falls has something to offer everyone. From the majestic views of the waterfall to the tranquil surroundings of the Bighorn River, this provincial recreation area is a gem waiting to be explored.
Getting Started: Planning Your Visit
Best time to visit Crescent Falls
When planning your visit to Crescent Falls Provincial Recreation Area, it's important to consider the time of year. The best time to visit is between May and October, as the weather is more favourable and the trails are more accessible. However, if you prefer fewer crowds, it's advisable to visit on weekdays or outside of the peak summer months of July and August. This will ensure a more serene and enjoyable experience.
Reservations and Camping
If you plan to camp, reservations can be made up to 90 days in advance of your arrival date. The campground offers a mix of first-come, first-served and reservable campsites, including 9 tent-only sites and 21 RV campsites. It's important to note that the campground has specific rules, such as limiting trailer size to 27 feet due to the steep hill and creek crossing.
Pack accordingly by bringing sturdy shoes, water, and snacks to enjoy during your hike. The trail includes areas with exposed roots, so footwear with a good grip is necessary. Additionally, consider the weather and pack layers, as well as any other personal items you might need for a comfortable and safe visit.
How to Get to Crescent Falls
To reach the stunning Crescent Falls Provincial Recreation Area, follow a series of straightforward directions. Whether you're traveling from major cities like Edmonton or Calgary or nearby towns such as Rocky Mountain House, the journey is simple and rewarding.
From Nordegg and Rocky Mountain House
If you’re starting from Nordegg, Alberta, take Highway 11 westbound for approximately 11.2 miles (18 kilometers). Look for the clearly signed road to Crescent Falls and turn right. Continue on this road for about 2.5 miles (4 kilometers) before turning left into the Crescent Falls trailhead area.
From Edmonton, Calgary, and Red Deer
Travelers coming from Edmonton, Calgary, or Red Deer will need to pass through Rocky Mountain House. From there, take Highway 11, also known as the David Thompson Highway, directly to the turn for Crescent Falls Provincial Recreation Area. The turn is well-marked, and you'll see a sign indicating the lookout and trailhead.
It’s worth noting that the road into the park is not paved and features several sections with potholes. This can make the journey a bit bumpy, so ensure you drive cautiously and prepare for uneven terrain.
Parking and Access
Upon arrival at Crescent Falls Provincial Recreation Area, park at the day-use area near the campground for the easiest access to the trailhead. Please note that there is no general parking at the lower day-use area or within the campground. However, a drop-off zone is available. Designated stalls for those with an accessible parking placard are also provided in the drop-off zone.
Crescent Falls Trail Overview
Trail Details
The Crescent Falls hike is a relatively short and easy trail, making it accessible to a wide range of hikers. Here are the key details to help you prepare:
Distance: The trail is approximately 4.9 kilometres round trip, not including the optional detour to the base of the falls.
Difficulty: Rated as easy, this trail is suitable for most hikers, including families with small children, although it is not wheelchair accessible due to the rough terrain.
Elevation Gain: The trail has a minimal elevation gain of 71 meters, ensuring it remains relatively flat and manageable.
Surface: The trail is primarily dirt, with some sections featuring exposed roots, so sturdy footwear is recommended.
Trail Type: This is an out-and-back trail, meaning you will follow the same path to and from the falls.
Trail Description
The hike begins at the Bighorn Canyon lookout, marked by a small parking lot and a faded sign. The initial section of the trail is flat and shaded, passing through a forest before opening up to reveal the Bighorn River flowing at the bottom of a deep canyon.
As you continue along the top of Bighorn Canyon, the path alternates between forested areas and open views of the canyon. The trail eventually leads slightly away from the canyon edge and back into the forest, where you will start to hear the sound of Crescent Falls. A small wooden bridge marks a key point in the trail, after which you will come to a fork. Taking the left path at the fork offers one of the best views of Crescent Falls, showcasing both the upper and lower falls against a backdrop of snowy peaks.
Optional Detour
For those who are more adventurous, there is an optional detour to the base of the upper falls. This path is unmaintained and includes a warning sign due to the risks involved. However, it provides a unique and up-close view of the falls, adding an extra 15-20 minutes to your hike.
Safety Considerations
It is important to stay behind barriers and avoid getting close to the canyon wall, river, and waterfall plunge pools. The area has experienced incidents resulting in injuries and fatalities, so caution is paramount.
Additionally, the rock ledges around the top of the falls are slippery, and swimming at the bottom of the falls is strictly prohibited due to the strong undertow.
Safety Tips and Preparation
Proper Footwear: When venturing out to Crescent Falls, it is essential to wear the right footwear and clothing to ensure your safety. Invest in hiking boots or shoes with slip-resistant soles, especially if you plan to hike in wet or icy conditions. This type of footwear provides the necessary traction to prevent slips and falls on the trail.
Clear Pathways and Visibility: Ensure that your route ahead is clear of hazards such as rocks, clumps of snow, or stray branches. Scan the path at least six feet ahead of you to identify any potential trip hazards. This mindful approach will help you maintain your balance and avoid accidents.
Hands-Free and Balanced Walking: Keep your hands free for balance rather than carrying items in your hands. Opt for a backpack or shoulder bag to carry your essentials, allowing you to use your hands to stabilize yourself if needed. Walking slowly and deliberately, taking small steps, will also help you maintain better control over your movements.
Avoiding Shortcuts and Isolated Areas: Stick to familiar and well-marked trails rather than taking shortcuts through unfamiliar areas. This ensures that you are on a path that is more likely to be maintained and free from hidden hazards. Additionally, staying on designated trails increases the likelihood of getting help quickly if you encounter any issues.
Staying Informed and Prepared: Check the weather forecast before heading out and plan your route accordingly. Knowing the weather conditions can help you prepare for potential hazards such as ice, snow, or wet surfaces. It is also a good idea to let someone know your itinerary and expected return time.
Emergency Preparedness: Always carry a first aid kit and a means of communication, such as a phone or a two-way radio, especially if you are hiking in remote areas. Knowing basic first aid and having the necessary supplies can make a significant difference in case of an emergency. Additionally, consider bringing a whistle or other signaling device in case you need to call for help.
Mindful Walking Techniques: Take short steps or shuffle for stability when walking on potentially slippery surfaces. Keep your weight evenly distributed and walk flat-footed with your center of gravity directly over your feet. If you do slip, try to avoid using your arms to break your fall and instead roll with the fall to minimize injury.
Navigating the Crescent Falls Trail
Starting at the Bighorn Canyon Lookout
The hike to Crescent Falls begins at the Bighorn Canyon lookout. From the parking area, look to the right of the viewpoint where you will see a path marked by a faded sign and two large rocks blocking the entrance to the trail. This is the starting point of your journey to Crescent Falls.
Initial Forest Section
Begin by walking on a flat, shaded path through the forest. The trail is relatively easy and well-marked, allowing you to enjoy the serene surroundings. As you walk, the forest will occasionally open up to reveal stunning views of the Bighorn River flowing at the bottom of a deep canyon.
Along the Canyon Edge
The path continues along the top of Bighorn Canyon, with groups of trees separating it from the canyon’s edge. Be cautious here, as the trail is close to the canyon, and the views can be distracting. Ensure you stay on the designated trail to avoid any potential hazards.
Entering the Forest Again
You will re-enter the forest as the trail leads slightly away from the canyon. This section is less noteworthy in terms of views but is important for the overall hike. Keep an ear out for the sound of Crescent Falls, which will start to become audible as you progress through the forest.
The Wooden Bridge and Trail Fork
After walking through the forest, you will come across a small wooden bridge. Once you cross the bridge, you will reach a fork in the trail. Here, you have two options:
Right Path: This path is a shortcut to the waterfall, but it misses one of the best views.
Left Path: This path leads through the forest towards Bighorn Canyon and offers an incredible viewpoint of Crescent Falls. It is worth taking this route to see both the upper and lower falls against a backdrop of snowy peaks.
Approaching the Falls
As you continue on the left path, you will eventually loop back to the main trail. The trail will then lead you towards the falls, with minimal scenery until you almost reach the falls. Just before the main viewing area, you may notice a side trail with a warning sign, which leads down to the base of the upper falls. However, this path is not recommended due to safety concerns.
Main Viewing Area
The main trail will soon arrive at the edge of the canyon, where you can safely view the falls from behind a railing. Here, you will find an observation deck jutting out beside the brink of the falls. This is a minor downhill walk to the platform, offering a safe and spectacular view of Crescent Falls.
Optional Descent to the Base
If you decide to take the side trail to the base of the upper falls, be extremely cautious. This path is steep and involves a warning sign due to the risks involved. The descent is about 15-20 minutes, and once at the bottom, you will find a rock slab where you can view the falls safely from a distance. The area is wide enough to stay away from the cliff edge, but it is important to remain vigilant about your surroundings.
Return Journey
When you are ready to leave the falls, the return journey is on the same path you took to get there. If you took the left path at the fork, you could now take the shortcut on the right to return to the parking area, making the hike slightly shorter on the way back.
Enhancing Your Experience
Capturing the Moment: Photography Tips
If you are an avid photographer or simply want to capture the beauty of Crescent Falls, there are several tips to enhance your photography experience.
For waterfall photography, use Aperture Priority mode with an aperture range of F8 to F11 and an ISO of 100 or 200. These settings help achieve a silky smooth effect on the water. Adjust your shutter speed to be between 1/8th to 1 second to capture the desired flow of water.
A good tripod is essential for stabilizing your camera, especially when using slower shutter speeds. A polarizer is also necessary as it reduces reflections, allows for longer shutter speeds, and enhances the colors of the scene.
Shoot during soft, low-light conditions, such as early morning, late afternoon, or overcast days. These conditions provide softer light with lower contrast, making it easier to capture the dynamic range of the scene without needing to bracket exposures.
Don’t just focus on the waterfall itself; include foreground and middle-ground elements like large rocks or smaller mini-falls. This helps the viewer's eye travel naturally from the foreground to the falls, adding depth and context to your photographs.
Immersing in Nature
Embrace all types of weather to capture unique and vibrant images. Rainy or overcast days can provide saturated shadows and vibrant colors, while icy conditions can transform the area into a winter wonderland.
Venture into the darker, sun-starved areas of the canyon to discover hidden gems. These areas often yield the most beautiful and intimate scenes, especially when armed with a sturdy tripod to handle low-light conditions.
Crescent Falls Campground
Campsite Options and Amenities
The Crescent Falls Campground offers a diverse range of campsites to cater to different types of campers. The campground includes 9 tent-only sites and 21 RV campsites, with a maximum trailer size limit of 27 feet due to the steep hill and creek crossing upon entry.
RV and Tent Sites
RV Sites: These sites are unserviced, meaning they do not have power or water hookups. However, they are well-maintained and provide a comfortable stay for RV campers.
Tent Sites: The tent-only sites are walk-in sites, offering a more secluded and peaceful experience for those who prefer to camp without the amenities of an RV.
The campground is equipped with several amenities to ensure a comfortable and enjoyable stay.
Each campsite comes with picnic tables and fire pits, allowing campers to enjoy meals and campfires in a scenic setting. Firewood is available for purchase on-site.
While there is no potable drinking water available due to the risk of groundwater contamination, there is a water pump for non-potable uses. Campers are advised to bring their own drinking water. The campground also features pit/vault toilets.
For equestrian campers, there are designated campsites with hitching rails, a loading ramp, and corrals. This makes it an ideal spot for horseback riders who want to explore the surrounding trails.
The campground is closely linked to the day-use area, which offers newly renovated platforms for safely viewing the falls. A new access trail from the upper parking lot leads to the day-use area, providing easy access for all visitors. However, there is no general parking at the lower day-use area or within the campground, but a drop-off zone is available.
Reservations and Fees
Reservations for campsites can be made up to 90 days in advance of the arrival date. The camping fee is $28 per night for both tent and RV sites. Alberta seniors can also apply for a 25% camping fee discount for select campground bookings starting from May 1, 2025.
The campground offers designated stalls for visitors with an accessible parking placard in the drop-off zone. This ensures that all guests can access the facilities comfortably and without difficulty.
Conclusion: Crescent Falls
Crescent Falls Provincial Recreation Area in Clearwater County, Alberta, is a hidden gem that combines natural beauty with outdoor adventure. To make the most of your visit, it's essential to plan carefully, selecting the right time of year and preparing with the necessary gear and safety precautions.
The hike to Crescent Falls is relatively easy, but it does require attention to safety, particularly around the canyon and waterfall areas. The campground offers a comfortable stay, complete with amenities such as picnic tables, fire pits, and equestrian facilities.
Take full advantage of the recently upgraded trails, viewing platforms, and access roads to soak in the stunning views of the Bighorn River Canyon and the majestic Crescent Falls. Whether you're a photographer, hiker, or simply a nature enthusiast, Crescent Falls has something to offer everyone.
FAQS about Crescent Falls
How long does it take to hike Crescent Falls?
The main out‑and‑back hike is about 4.9 km round‑trip and typically takes 1–1.5 hours, with an extra 15–20 minutes if you detour down to the base of the falls.
Where is Crescent Falls, Alberta near?
Crescent Falls Provincial Recreation Area is located 22 km west of Nordegg on Highway 11, then 6 km north on a gravel access road.
Can you swim in Crescent Falls?
Swimming below or near the waterfalls is prohibited due to swift currents and public safety regulations.
Is Crescent Falls dog-friendly?
Yes—dogs are welcome on the trail but must be kept on a leash at all times
During my last visit to Abraham Lake, I stumbled upon the Hoodoo Creek Trail and was captivated by its stunning landscapes, inviting me to explore further.
On this hike, you'll not only witness the fascinating hoodoos but also uncover the hidden treasures of the trail that make it a must-visit destination.
Locating the Trailhead
The first step is to get to Highway 11. This highway is your gateway to the trail. Look for a green highway sign that indicates Hoodoo Creek. This sign is your friend. It will guide you to the right spot.
Locate the trailhead along Highway 11, marked by a green highway sign.
Look for a cairn that marks the beginning of the trail.
Weekend visits may yield more visible parking due to increased foot traffic.
Once you see the sign, you’re almost there! The trailhead is located 2.8 km west of the Windy Point access. It’s easy to miss if you’re not paying attention. Keep your eyes peeled for a cairn. This is a pile of stones that marks the start of the trail. It’s not fancy, but it’s reliable.
Parking can be tricky. There isn’t an official parking lot at the trailhead. However, on weekends, you might find more cars parked along the road. This is a good sign! It means other hikers are also looking for adventure. If you visit during the week, be prepared for less visible parking. You may need to park a little farther away and walk back to the trailhead.
Challenges in Finding the Trail
Many explorers faced challenges when trying to find the trail. It’s common to feel a bit lost at first. But don’t worry! You’re not alone. The Hoodoo Creek trail can be a little hard to find initially. The good news is that Alberta Transportation has made it easier. The green highway sign is a recent addition, and it helps a lot.
Remember, the Hoodoo Creek is located 52 km east of Saskatchewan Crossing. This is a helpful landmark to keep in mind. If you’re heading west from Windy Point, the creek is the first major one you’ll encounter.
What to Expect Once You’re On the Trail
Once you find the cairn and start your hike, you’ll be greeted by stunning views. The trail runs along the right side of the creek. It steadily gains elevation, so be prepared for a bit of a workout. But the views of Abraham Lake and the surrounding mountains are worth it!
Have you ever wondered how these hoodoos were formed? They are a result of the natural processes that shaped our planet. The glaciers deposited a mix of clay, sand, and rocks, which, over time, became cemented together. As water eroded the softer materials, the harder rock remained, creating these stunning formations. Standing in their presence, you can’t help but feel a sense of awe. It’s like stepping into a natural gallery, where each hoodoo is a masterpiece crafted by nature itself.
And let’s not forget the views! As you hike, you are treated to splendid sights of Abraham Lake and the surrounding mountains. The shimmering water reflects the sky, creating a picturesque scene that feels almost surreal. It’s a perfect spot to pause, breathe deeply, and soak in the beauty around you. Do you feel the peace that comes from being in such a magnificent place? Nature has a way of calming the mind and rejuvenating the spirit.
The Hoodoo Creek Trail is a 3.8 km return hike with an elevation gain of approximately 360 meters. This means you’ll be climbing a bit, but it’s manageable for most hikers. The trail is marked as a moderate challenge, making it suitable for families. So, if you’re looking for a family-friendly hike, this could be the one for you!
Initially, the trail is in good shape. For the first kilometer, you’ll walk along a well-defined path that stays to the right of the creek. It steadily gains elevation, and the views improve as you go. You might even find yourself stopping to take pictures!
After that first kilometer, however, things change. You can expect a mix of walking and scrambling. The trail becomes less defined, and you’ll find yourself navigating through the creek bed. It’s part of the adventure! Just remember, as the saying goes,
“The best views come after the hardest climbs.” - Unknown
Notes for Hikers
After the initial 1 km, anticipate a change in terrain towards the creek bed.
Look out for the two unique hoodoos on the hike.
While the creek is mostly shallow, it’s essential to wear proper footwear. You’ll be hiking on a creek bed, over boulders, and up that scree slope. It’s not just a walk in the park! Be prepared for a bit of a workout.
Beyond the Cave: Extending Your Adventure
After visiting the cave, you might think your journey is complete. But wait! If you have time, it’s well worth continuing up the creek for an additional 300 to 600 metres. This extra distance can lead you to some truly spectacular sights.
Enriched Views: The right fork up the creek offers beautiful cascades and panoramic views of the valley.
Impressive Sights: You’ll be treated to stunning views of Mount Michener and the V-shaped valley below.
What to Expect
As you venture further, the scenery changes. The creek widens, and you’ll hear the soothing sound of water cascading down rocks. It’s like nature’s own symphony. The vibrant colors of the valley come alive, especially during sunrise or sunset. Imagine standing there, surrounded by nature’s beauty. It’s a moment you won’t forget.
But don’t forget, the extra distance requires planning. Make sure to fit this into your schedule. If you’re not in a rush, take your time. Enjoy the sights and sounds around you. After all, hiking is not just about the destination; it’s about the journey.
Tips for Your Extended Hike
Here are a few tips to make the most of your extended hike:
Proper Footwear is Essential: First and foremost, proper footwear is essential. The trail is rocky with a creek bed that can be uneven. You’ll be walking over boulders and scrambling up steep slopes. Wearing the right shoes can make all the difference. Think about it: Would you wear flip-flops to a rocky beach? Of course not! The same logic applies here. Invest in a good pair of hiking boots. They provide support and grip, helping you navigate the tricky terrain safely.
Monitor Weather Conditions: Next, always monitor weather conditions. The weather can change rapidly in the mountains. A sunny day can quickly turn into a storm. Avoid hiking in heavy rain or storms. Wet rocks can be slippery, increasing your risk of falling. Imagine trying to walk on ice—it's not easy! Check the forecast before you head out. If storms are predicted, it’s best to postpone your hike.
Be Prepared for Varying Trail Conditions: Lastly, be prepared for both easy walking and strenuous scrambling. The Hoodoo Creek trail is not just a walk in the park. It has sections that require you to scramble over rocks and climb steep slopes. You might find yourself moving from a gentle path to a challenging scramble in a matter of minutes. Are you ready for that? Carrying a small backpack with water and snacks can help keep your energy up during those tougher sections.
Notes on the Trail
Many hikers underestimate the trail's challenge. They think it will be an easy stroll, but that’s often not the case. The creek is shallow most days, but it can be treacherous in poor conditions. Remember, just because the creek looks calm doesn’t mean it’s safe. Always be cautious and aware of your surroundings.
"Preparation breeds confidence." - Unknown
When you prepare properly, you’ll feel more confident on the trail. You’ll enjoy the beauty of the Hoodoo Creek hike without worrying about unexpected challenges.
Concluding Thoughts: Embrace the Adventure
As you wrap up your hike along the Hoodoo Creek Trail, take a moment to truly appreciate what you’ve experienced. This trail is not just a path through the wilderness; it’s a journey through time and nature. You’ve discovered the unique geological features of the hoodoos, those fascinating pillars that stand tall against the sky. Each hoodoo tells a story of glaciers that once roamed this land, leaving behind a legacy of beauty and wonder.
Used only with old Urchin versions of Google Analytics and not with GA.js. Was used to distinguish between new sessions and visits at the end of a session.
End of session (browser)
__utmz
Contains information about the traffic source or campaign that directed user to the website. The cookie is set when the GA.js javascript is loaded and updated when data is sent to the Google Anaytics server
6 months after last activity
__utmv
Contains custom information set by the web developer via the _setCustomVar method in Google Analytics. This cookie is updated every time new data is sent to the Google Analytics server.
2 years after last activity
__utmx
Used to determine whether a user is included in an A / B or Multivariate test.
18 months
_ga
ID used to identify users
2 years
_gali
Used by Google Analytics to determine which links on a page are being clicked
30 seconds
_ga_
ID used to identify users
2 years
_gid
ID used to identify users for 24 hours after last activity
24 hours
_gat
Used to monitor number of Google Analytics server requests when using Google Tag Manager
1 minute
_gac_
Contains information related to marketing campaigns of the user. These are shared with Google AdWords / Google Ads when the Google Ads and Google Analytics accounts are linked together.
90 days
__utma
ID used to identify users and sessions
2 years after last activity
__utmt
Used to monitor number of Google Analytics server requests
10 minutes
__utmb
Used to distinguish new sessions and visits. This cookie is set when the GA.js javascript library is loaded and there is no existing __utmb cookie. The cookie is updated every time data is sent to the Google Analytics server.